Read on and find more information about:
- Exporting all content elements as XLS
- Exporting filtered content and single content pieces as XLS
- Adjusting the permission to allow XLS exporting
- Exporting content as PPT
- Exporting and re-importing to update content
Exporting all content elements as XLS
You will find the option to export content always within the top menu next to the Search bar [1]. If you do not apply any specific filter or select single elements, all the content that is currently displayed will be downloaded.

Click the export button, and you will receive an email that contains the files for download [2]. The number of files you receive depends on the number of content/element types contained in the list of content elements. That means that for each content element type contained, you will receive a respective file.

From the email, click on the links and receive the Excel files.
Please note that:
- the export limit is 1000 elements per request, i.e., one file can at maximum contain only 1000 elements, although you might have stored more elements of the same type. For this, please use the filter option and sequentially request the exports.
- text style options are not taken into the export. Text is used as plain text.
- exporting aggregated rating properties is not supported, as their inclusion would disrupt the format required for re-importing data.
- the export link expires after 7 days.
Exporting filtered content and single content pieces as XLS
If you want to export a specific set of content, you can use the filter to specify the content list. Find the filter section at the top right of the screen [3]. Apply your filters.
When you now hit the export button, the filtered list of content will be downloaded [1].

If you only want to export some content elements, you also have the option to select the respective content elements via the checkbox available in the Explorer [4]. Find your content elements, hover over them, tick the checkbox at the top left of the element card, and - once all individual content elements have been selected - hit the export button. An email will be sent to you containing the Excel files to download [5].

Adjusting the permission to allow XLS exporting
Per default, the Workspace Admin and Moderator role have the right to export content. However, you can extend (or restrict) the export permission to other user roles.
To do see this article, changing permissions.
Exporting content as PPT
You will find the option to export content as PPT on every single content card if configured for this element type. Click on the three dots in the header. Click on Export as PowerPoint. The download will start automatically.
If you don't have this option, see this article.
Note
- The PPT template needs to be set by your Application Admin.
- There is currently no bulk export. You can only export PowerPoint Slides per one content element.
- Rich Text Editor (RTE) formatting is removed during export.
- Relations, Attachments, and Units of Number Fields are not included in exports.
- Only the lowest level of Hierarchical Dropdowns is exported.
- Exporting Element Types with Workflow Blueprints is currently unsupported, including the current phase.
Exporting and re-importing to update content
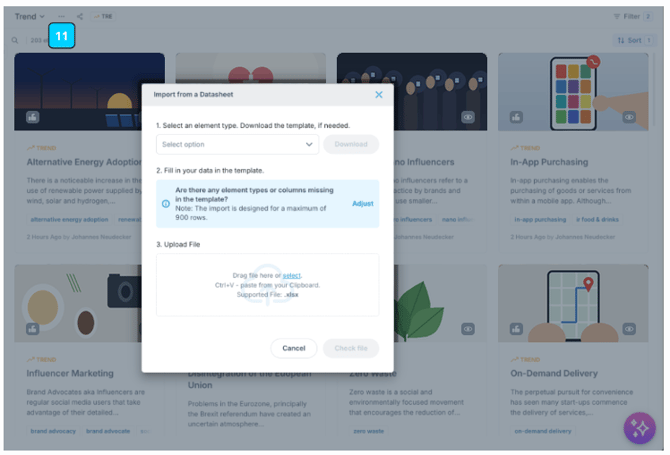
When you want to use the export option to bulk update the content in your workspace, you can easily do so. Just follow the steps mentioned above, apply your changes directly in the Excel file and re-import the content from the import option, sitting right next to the export option under the three dots [11].
Select now the right content type and upload your edited file.
The structure of the import and export files are 100% identical. Please yet note that text style options are not taken into the export and import. Text is used as plain text. If you click the option to update existing content, styled content will get lost. It might make sense in this case to skip content with applied text styles and edit them manually.
Read more about the import feature in this article.