Start setting up a campaign in just 5 minutes to collect and process systematically the most promising ideas from your co-workers. Learn more about the campaign setup, settings, permissions, and also the auto-creating and rating of ideas
Note: The campaign feature will not be automatically available to all subscribers and may be part of a separate ITONICS subscription plan. If you would like to use the feature, contact us via account_manager@itonics-innovation.com.
- Configure the general layout of your campaigns and ideas
- Roles and permissions for campaigns and ideas
- Start Creating (or Editing) A Campaign
- Submit an Idea or Use Auto-Idea Generation
- Manage the Submissions of a Campaign and Use the Idea Auto-Rate
Configure the general layout of your campaigns and ideas
You can define which properties and ratings are required for your specific campaign from the element configuration.
There are two scenarios in which you would want to configure the layout of your elements:
Scenario 1: The property you want to add already exists
Go to the workspace-level element configuration and add existing properties and ratings to your campaign or idea.
Note: To perform this action, you must have the required role of Workspace Admin.
Scenario 2: The property you want to add does not exist
Go to the organization-level element configuration and create/configure new properties (learn more here) according to your needs. These can then be added to your campaign or idea element type on the workspace level, as described in Scenario 1.
Note: To perform this action, you must have the required role of Workspace Admin.
By this action, you can define what properties and information are shown on the campaign landing page to potential idea submitters:
 Similarly, you can define the properties and information that need to be added on a respective idea submission by any submitter.
Roles and permissions for campaigns and ideas
The following table shows the respective permissions that are granted on the campaign and idea level to the different user roles.
Campaign permission table
In the table below, the campaign-specific permissions are listed:
| Permissions | Workspace Admin | Moderator | Evaluator | Scout | Viewer | |
| View Any Campaign | x | x | x | x | x | |
| Create Any Campaign | x | x | x | x | ||
|
Edit Any Campaign
|
x | x | ||||
| Start and Stop Any Campaign | x | x | ||||
|
Create, edit, and delete to-do’s on the campaign level that will be inherited into ideas
|
x | x | ||||
|
Edit phase descriptions that will be inherited into ideas
|
x | x |
Idea permission table
In the table below, the idea-specific permissions are listed:
| Permissions | Workspace Admin | Moderator | Evaluator | Scout | Viewer | |
| View Any Idea | x | x | x | x | x | |
| Create Idea | x | x | x | x | ||
|
Edit Any Idea
|
x | x | ||||
|
Move ideas to the next phase
|
x | x | ||||
|
Change the phase status of ideas
|
x | x |
Please note that it is currently not possible to adjust the permissions and the roles.
Start Creating (or Editing) A Campaign
After you configured your campaign template (cf. the paragraph above), you can start adding any campaign and its details, e.g., a title, description, and campaign owner.
To do so, click on the Create button in the left menu [1]. Within the opening menu, search for the element type "Campaign" and select it [2]. You can now choose between the two default ITONICS Campaign workflow templates [3]. When you click on it, you will land on a page, explicating the workflow stages [4].

Click Use Template to start creating your campaign based on the selected workflow template [5].
In case you want to abort your selection, click back to navigate back to the workflow template overview screen.
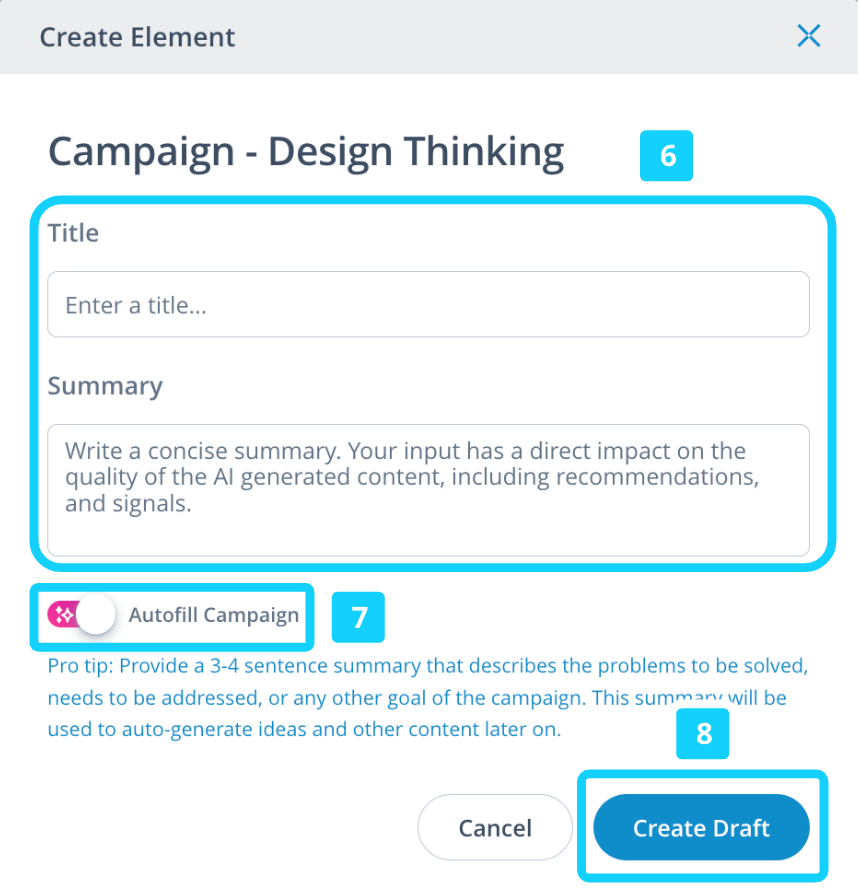
To continue the campaign creation process, fill out the first basic information for your campaign (Title, Summary, [6]). Toggle the Autofill Campaign slider to fill your campaign profile with the help of Gen-AI [7]. This will trigger a sequence that helps you to create a header image, tags, and a campaign description with minimal input (this step is optional).
Finish the creation process by clicking the Create Draft button [8].
Note: Campaigns will always be created as a draft and, thus, will not be published automatically like other element types.
Campaigns will only ask for very basic information in the creation dialogue during the creation process. Using the Element Configuration enables you to include further properties for campaigns during and after the initial creation.
After finishing step 9, your campaign will be created and automatically open on the element detail page. From here, you can enrich your campaign by adding additional information. If you have activated the Autofill Campaign toggle in step 8, a wizard will guide you through the process of creating content with the help of Gen-AI.
Learn more about our smart action features here (auto-fill header image, description, text).
Once all important campaign information is provided, you can open the campaign for submissions. Find the "Start Campaign" Button to the right and click on it. During the entire ideation process, you can enable or disable the submission of ideas by users. In certain stages of the workflow, such as the Submission or Concept Development phases, you may want to allow for idea submissions, while other stages, like Implementation or Run, are not appropriate for submissions.
To open or close a campaign and allow users to submit ideas or not, you have to click the the Start or Close Submissions button on the right-hand side of the workflow widget of the campaign.
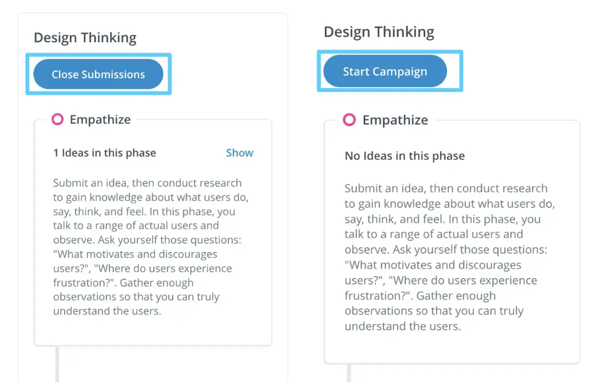
Once you have clicked the Close Submissions button, users cannot submit new ideas until you click the Start Campaign button, which will reopen the campaign and allow users to submit ideas again (read more under "Manage the Submissions of a Campaign and Use the Idea Auto-Rate" below).
Submit an Idea or Use Auto-Idea Generation
If a Campaign Manager has opened a campaign for submissions, you can easily submit your idea by finding the "Submit Idea" button on the campaign banner image [1]. Fill out the idea form with information on Title and Summary in the modal (2). Click Publish Idea (4) or Save as Draft (3).

Once the idea has been created, you can add more information, like a detailed description or any other information that is relevant to your idea in the context of the campaign.
Any idea will run through different workflow phases with different tasks. If there is an open to-do, a red dot will appear next to the Workflow tab on your idea, indicating that there are still tasks that need to be completed. To maintain to-do’s, the users must have permission to edit elements (cf. the workspace permissions per role).
Note: If you click the Save as Draft button, you are not making the idea publicly available to all users (check out the permission configuration of your workspace to find out which user roles can view draft elements). This gives you the option to fine-tune your idea before you share it with others.
Once you have started your campaign you can also let the machine create ideas for you and leverage the power of generative AI.
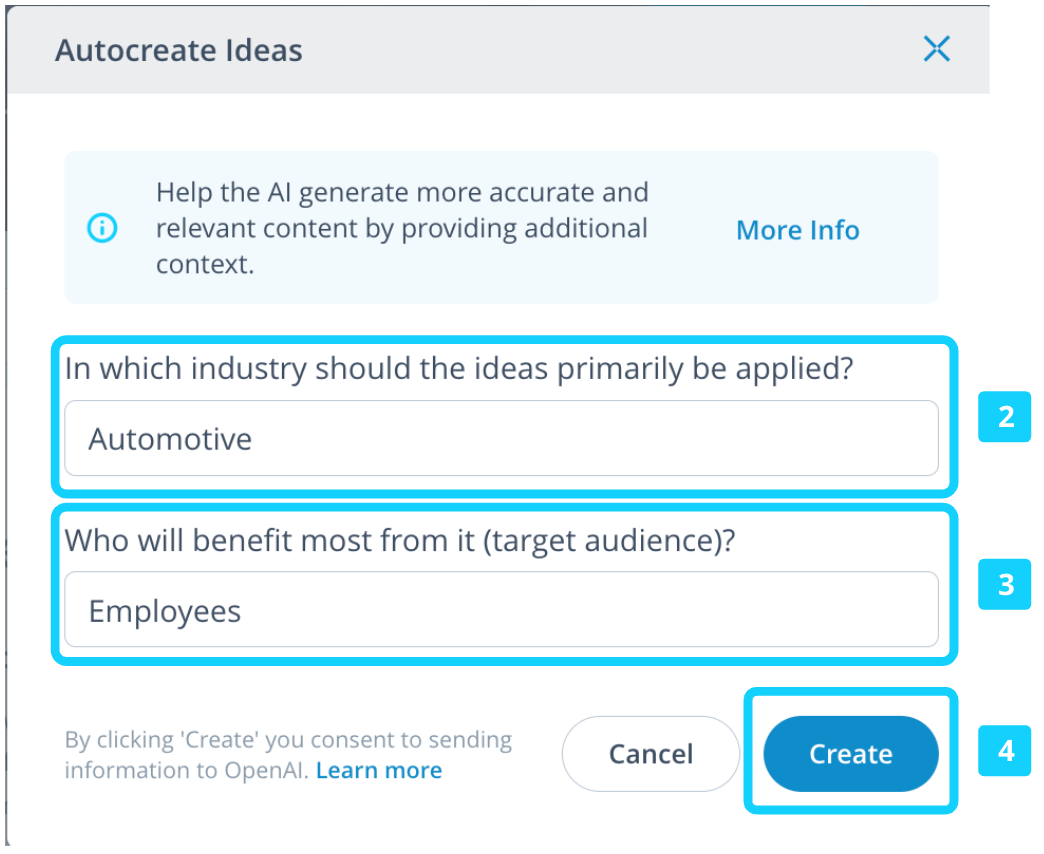
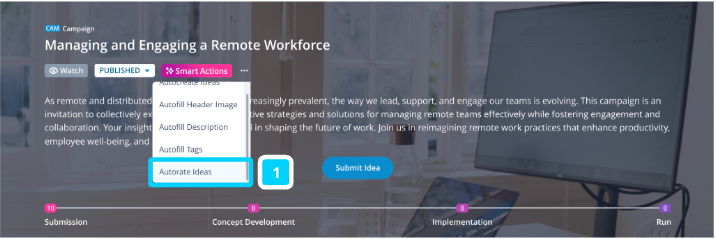
Click on the Smart Actions in the Campaign header and select Autocreate Ideas [1]. A modal will come up and will ask for more context to generate the best ideas possible (i.e., In which industry should the ideas primarily be applied [2]? Who will benefit most from it (target audience) [3]? Hit Create [4] once you have provided the relevant information. Click on Explore now once the ideas are created. You will be redirected to the Campaign Board to check out the AI-created ideas. The machine will create 5 ideas per use of the auto-create feature.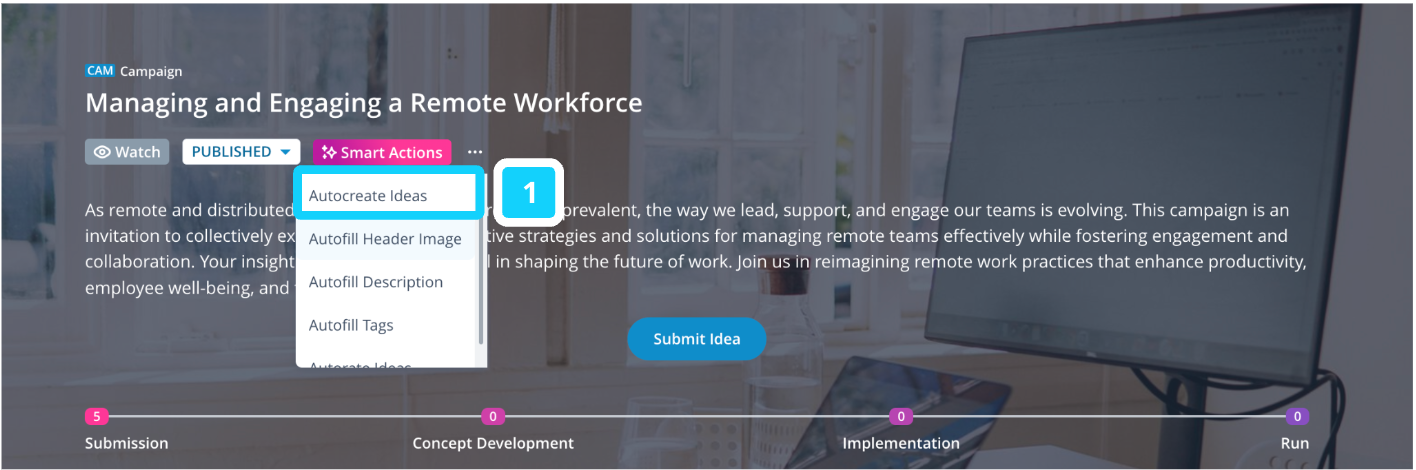
Manage the Submissions of a Campaign and Use the Idea Auto-Rate
Once all important campaign information is provided, you can open the campaign for submissions. Find the "Start Campaign" Button to the right and click on it. After the start, you can close (or re-open) a campaign and prevent any further idea submission from the same button.
Move ideas through the workflow
Promising ideas will progress through the workflow, while others may remain in earlier phases. You can either change the phase of ideas using drag and drop on the "Idea Board" Tab on the campaign page or by using the button "Move to the Next Phase" on the idea itself and in the Workflow Tab [1].

💡Pro Tip: Open the Board in a new tab. This allows you to easily open the ideas in a stack view and compare the details of each campaign, which will make your decision-making process more efficient.
Please note that you can only move ideas to the next phase [3] if the respective tasks for a workflow step are marked as done [2].

Note: All to-do’s of the current phase have to be checked otherwise, the idea cannot move to the next phase. You cannot move ideas to a previous phase, and you can not skip phases. You can also not move ideas that do not have the status "running".
Manage the status of ideas
You can change the status of ideas per phase. There are three different statuses per phase:
- Running: indicates that an idea is currently being actively pursued or implemented.
- Parked: indicates that an idea has been temporarily set aside or put on hold, but may be revisited in the future.
- Rejected: indicates that an idea has been evaluated and determined to not be feasible or in line with the goals of the campaign or organization.
To change the status of an idea, go to the idea Workflow tab and click on the three-dot-menu of the active phase [4]. Now, either select the option Parked or Rejected. Note that the default phase is always Running. You can also change the status back from Parked or Rejected to Running.
Rating ideas
During the different workflow phases, it may be necessary to rate the various ideas in terms of different rating criteria (that you can freely configure), while the rating criteria may vary depending on the specific phase of the workflow. To rate an idea, ask respective experts to provide their opinion via the rating sliders.

You can also ask the system to provide a rating automatically by leveraging the power of Gen-AI. To do so, click on the smart actions in the Campaign header and select "Auto-rate Ideas". A modal will come up to further specify which ideas you want to be rated. Choose the phases for which you want to rate the ideas. The phases that appear here are dependent on your selected workflow. Select the rating criteria you want to be rated by AI. The rating criteria that appear here are based on the configured rating criteria for the element type idea. Click Continue if you are satisfied with your selection. Click on Explore now once the ideas are rated. You will be redirected to the Campaign Board where you can check out the AI-rated ideas.
Connect existing ideas to a campaign
If you have an idea that you would like to add to the ITONICS system but do not want to connect it to a running campaign immediately, you have the option to create a standalone idea. This may be useful if there are no running campaigns that align with your idea if you do not have time to develop the idea yet fully, or if you simply want to save a vague idea for future reference.
If you then want to connect the standalone idea to a running campaign at a later stage, follow these steps:
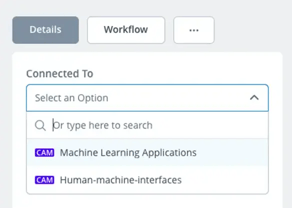
- Navigate to your idea.
- Click on the Connect To list field. All running campaigns will be listed.
- Select the respective campaign that you want to connect your idea to.
Confirm the action by clicking the Connect button in the shown modal.
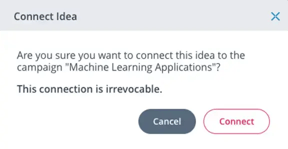
Note: This selection cannot be undone, and your idea will immediately inherit the workflow from the campaign you are about to connect your idea to.